Back up your database in 6 easy steps

No commands. No scripts. Install the app, click through a short four-question wizard, and your database is backed up automatically — every day, password-protected, to the place you choose.

Windows 10 & 11 10 minutes, start to finish 15-day free trial, no credit card
Video tutorial

Watch it in 3 minutes

The whole thing, start to finish: install, connect, choose a place, set a time.

From download to your first backup

Real screenshots of every screen you'll see. Follow along — it takes about ten minutes.

1

Download and install

Get the free installer, run it, and open SQL Backup. You land on the Dashboard — this is where every backup will show up later. Click the blue New backup button.

Nothing else to install — the app brings its own database tools
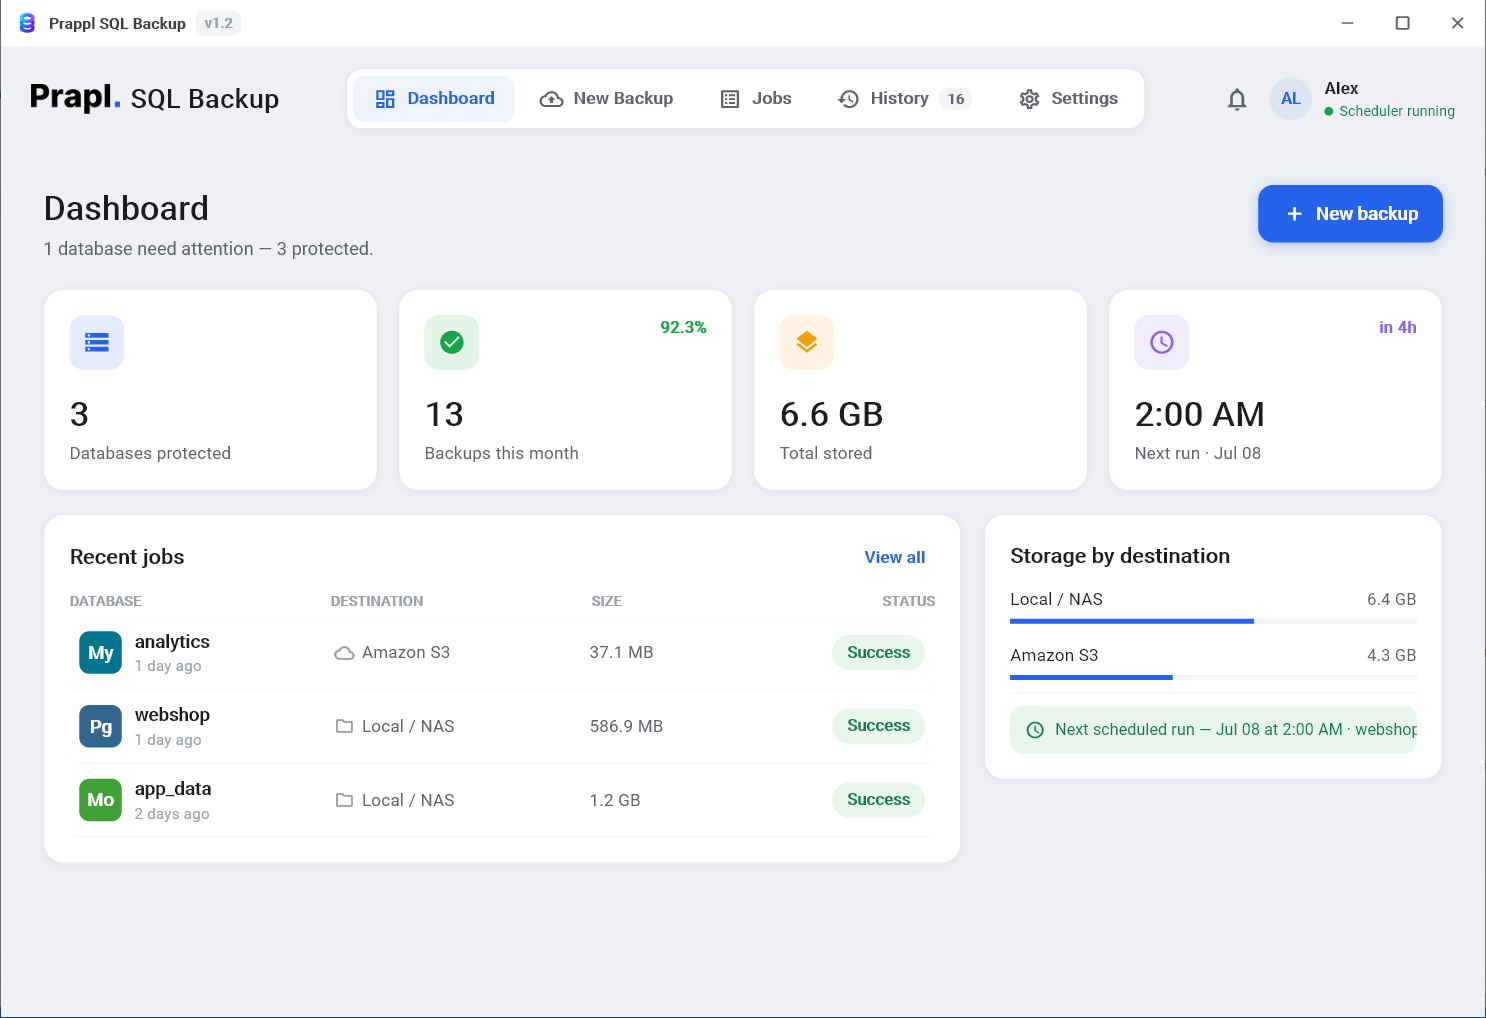
SQL Backup Tool dashboard with the New backup button
The Dashboard — every backup shows up here
2

Pick your database

Click the tile for the database you use — SQL Server, MySQL, PostgreSQL, MongoDB, MariaDB, Oracle, SQLite, Redis, ClickHouse or Elasticsearch. Not sure? It's whatever your website or app was built on; the person who set it up will know.

One app covers all ten — no extra licences
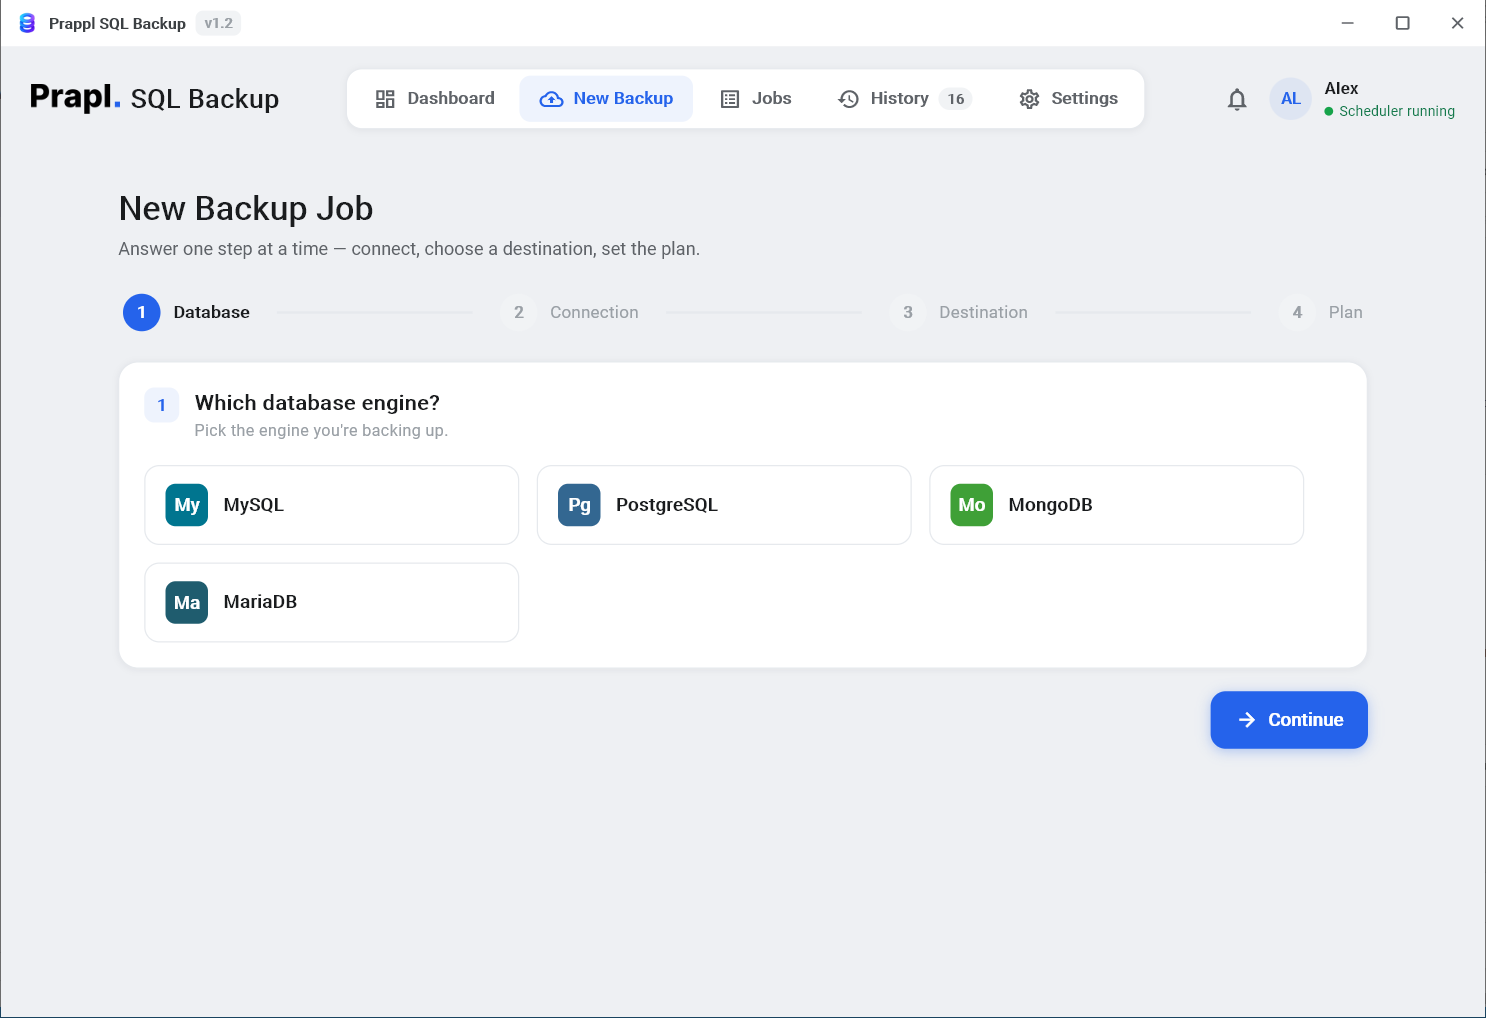
Step 1 of the wizard: choose your database engine
Which database? Just click it
3

Connect to it

Type the server address, username and password — the same details your application uses. Click Test & list databases: the app connects and shows what it found. Tick the databases you want to protect and click Continue.

Passwords are stored in Windows' own password vault, never in a file
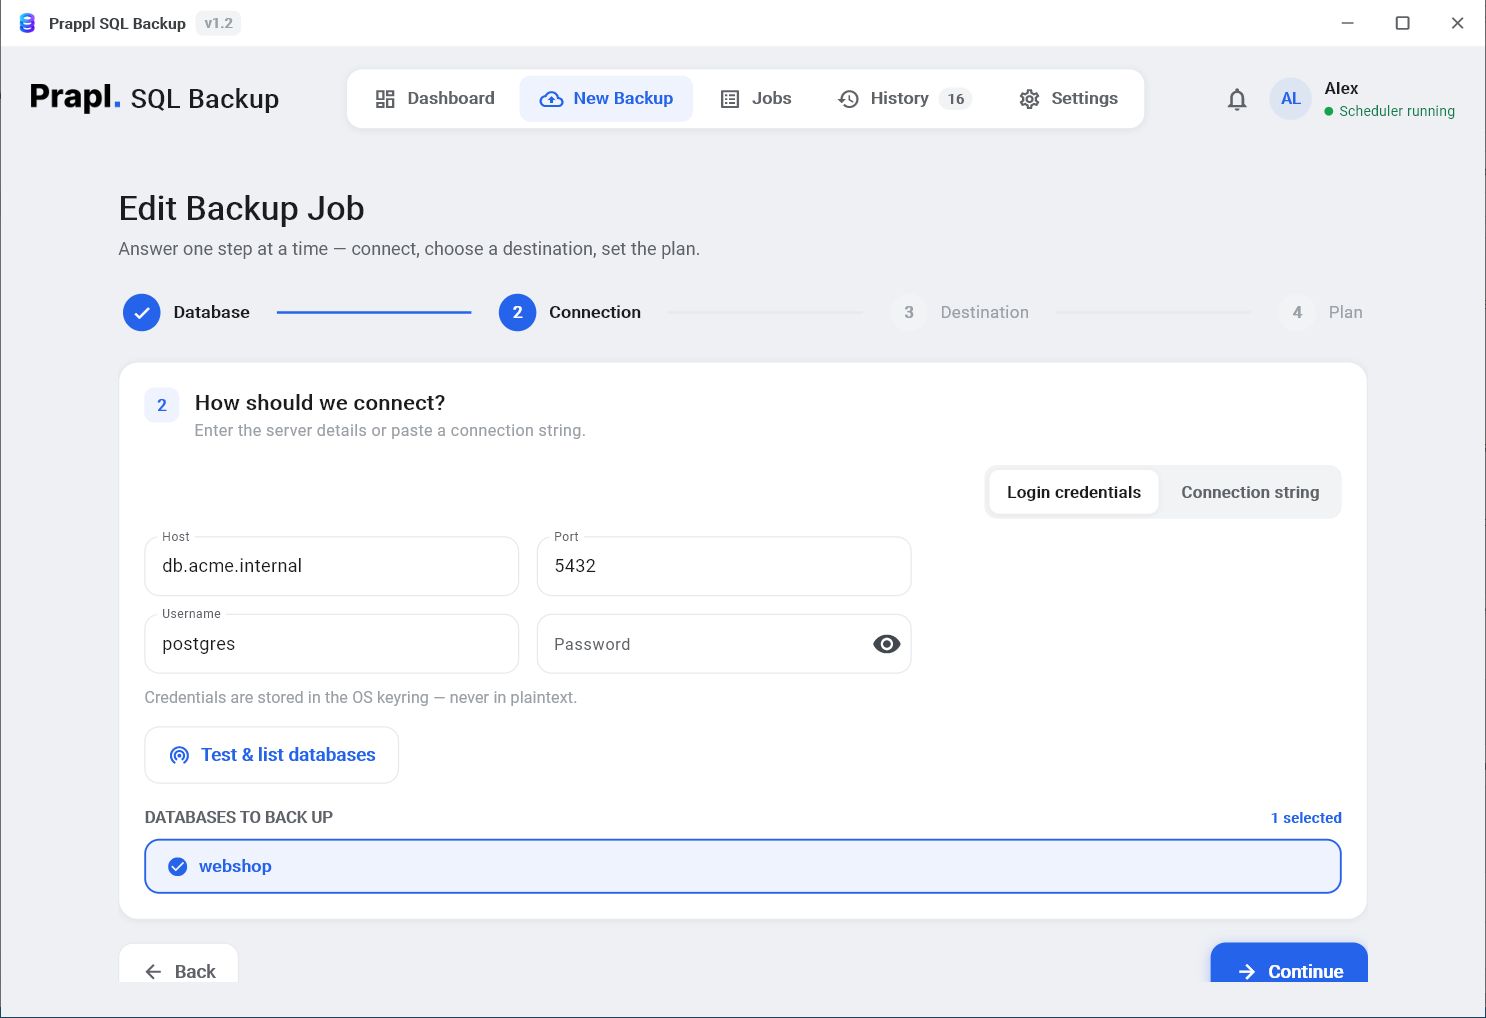
Step 2 of the wizard: enter the connection details and test the connection
Server, username, password — then Test
4

Choose where backups should go

A folder on this PC, an external drive, your NAS, OneDrive, Amazon S3, Wasabi, Backblaze, Cloudflare R2, MinIO, SFTP or FTP — click one and fill in its details. You can add a second place too, so every backup is kept twice.

Best choice: somewhere that isn't the same computer as the database
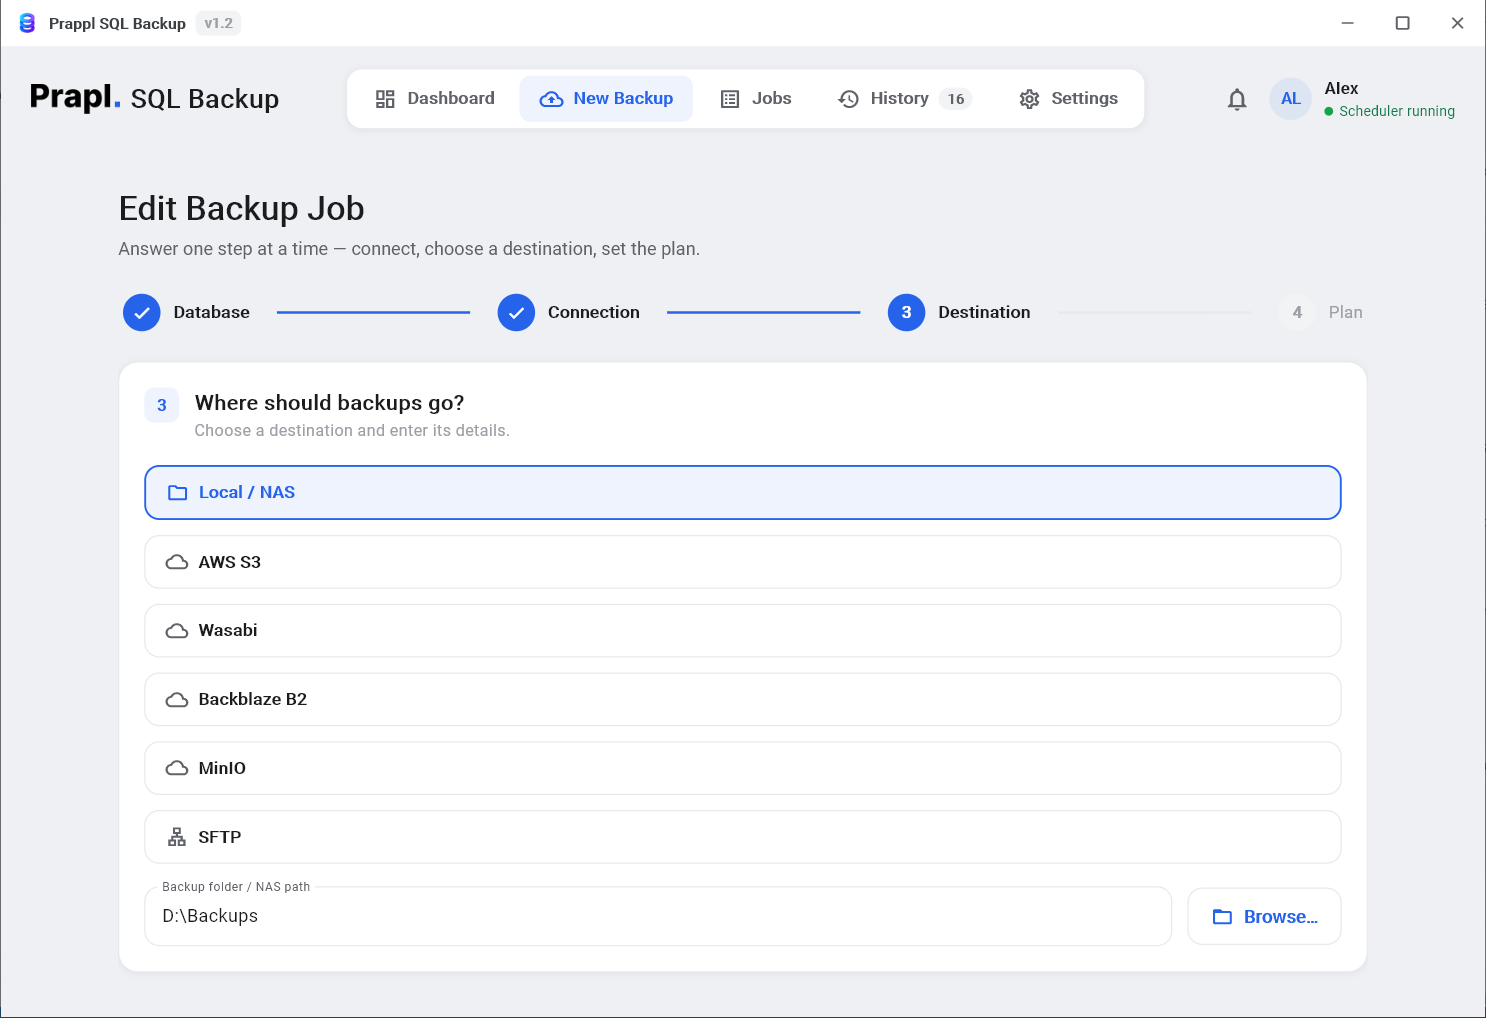
Step 3 of the wizard: choose a destination for the backup
Where should the backup be kept?
5

Set the schedule and press Run

Switch on Daily (or Weekly / Monthly), pick a time, say how many copies to keep, and choose a password so nobody else can open your backups. Then click Save & run now. That's it — your first backup starts immediately.

Most people choose Daily at 2 AM and keep the last 7 copies
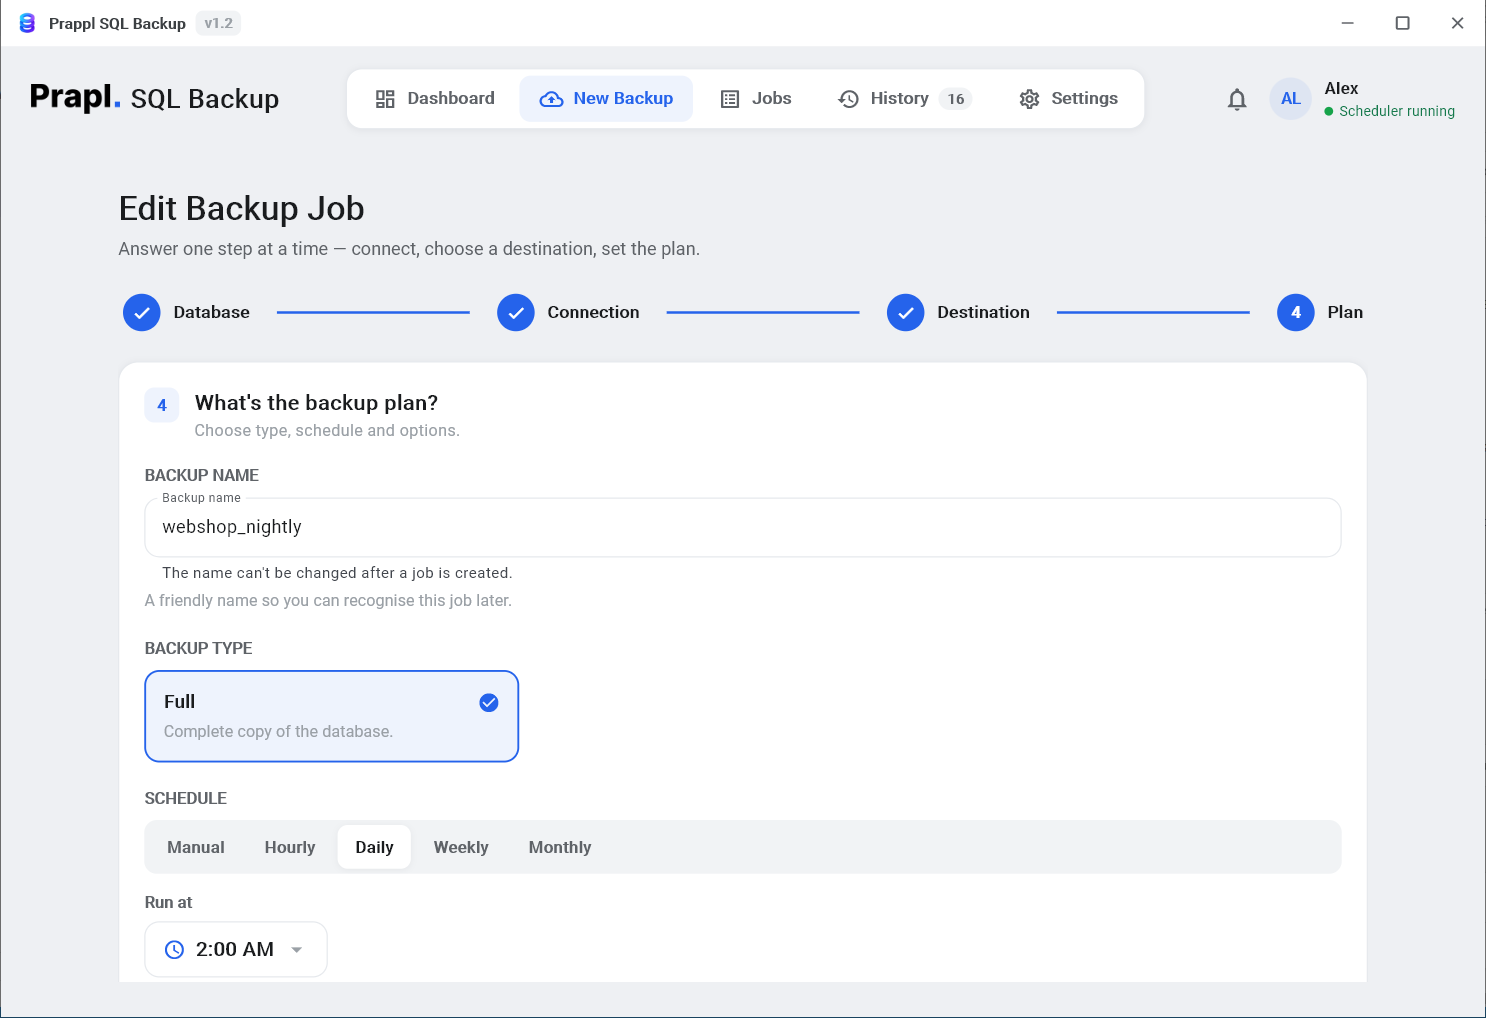
Step 4 of the wizard: schedule, retention and password protection
When, how many copies, and a password
6

Relax — it runs by itself

From now on backups run on schedule, even when the window is closed (the app sits quietly in the system tray). The Dashboard shows every run: green means success, red means something needs a look — and you can get an email the moment a backup fails.

Set it once and forget it
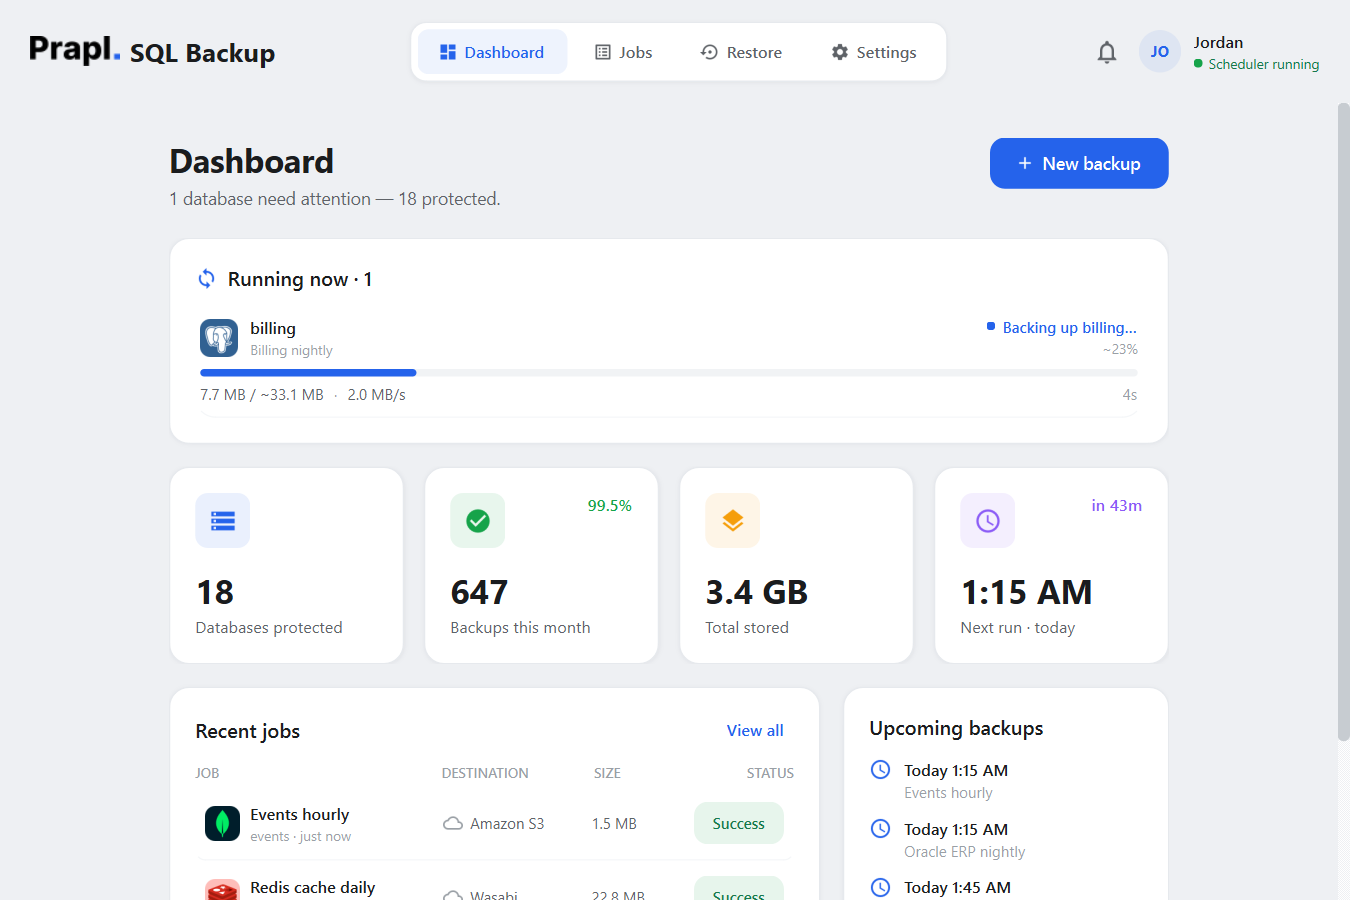
The dashboard showing a backup running with a progress bar
A backup running — you can keep working meanwhile

Getting your data back is just as easy

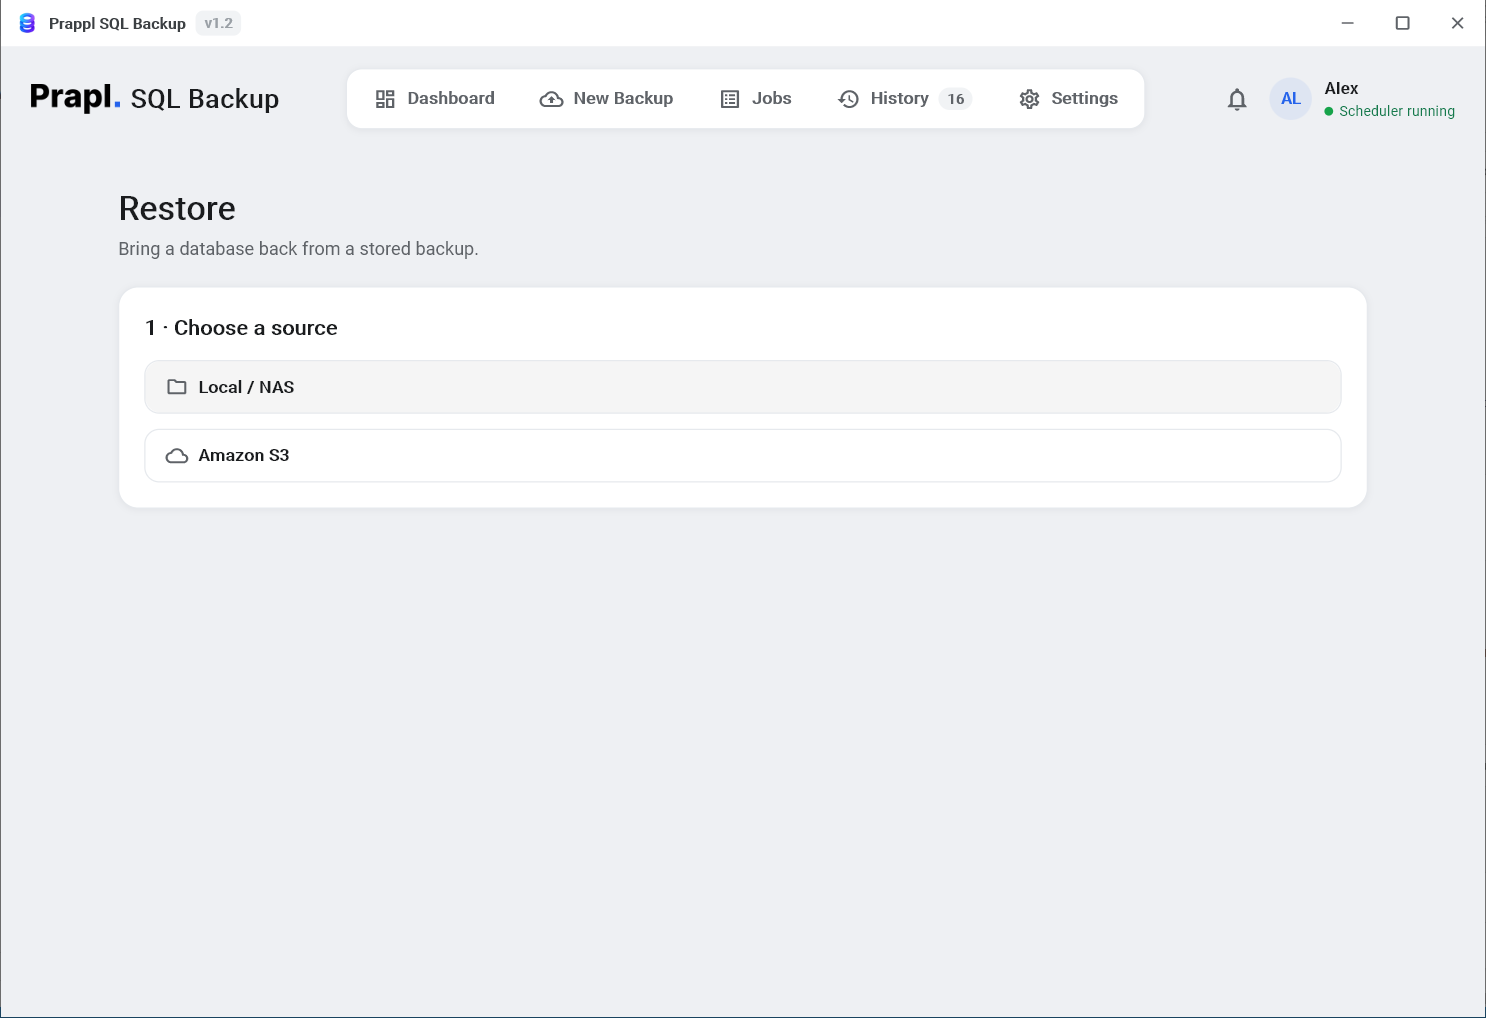
Deleted something by mistake? Server died? Open Restore, click the backup, and the app puts everything back for you.

Restore screen: one tile per backup job
Restore → click the job you want back
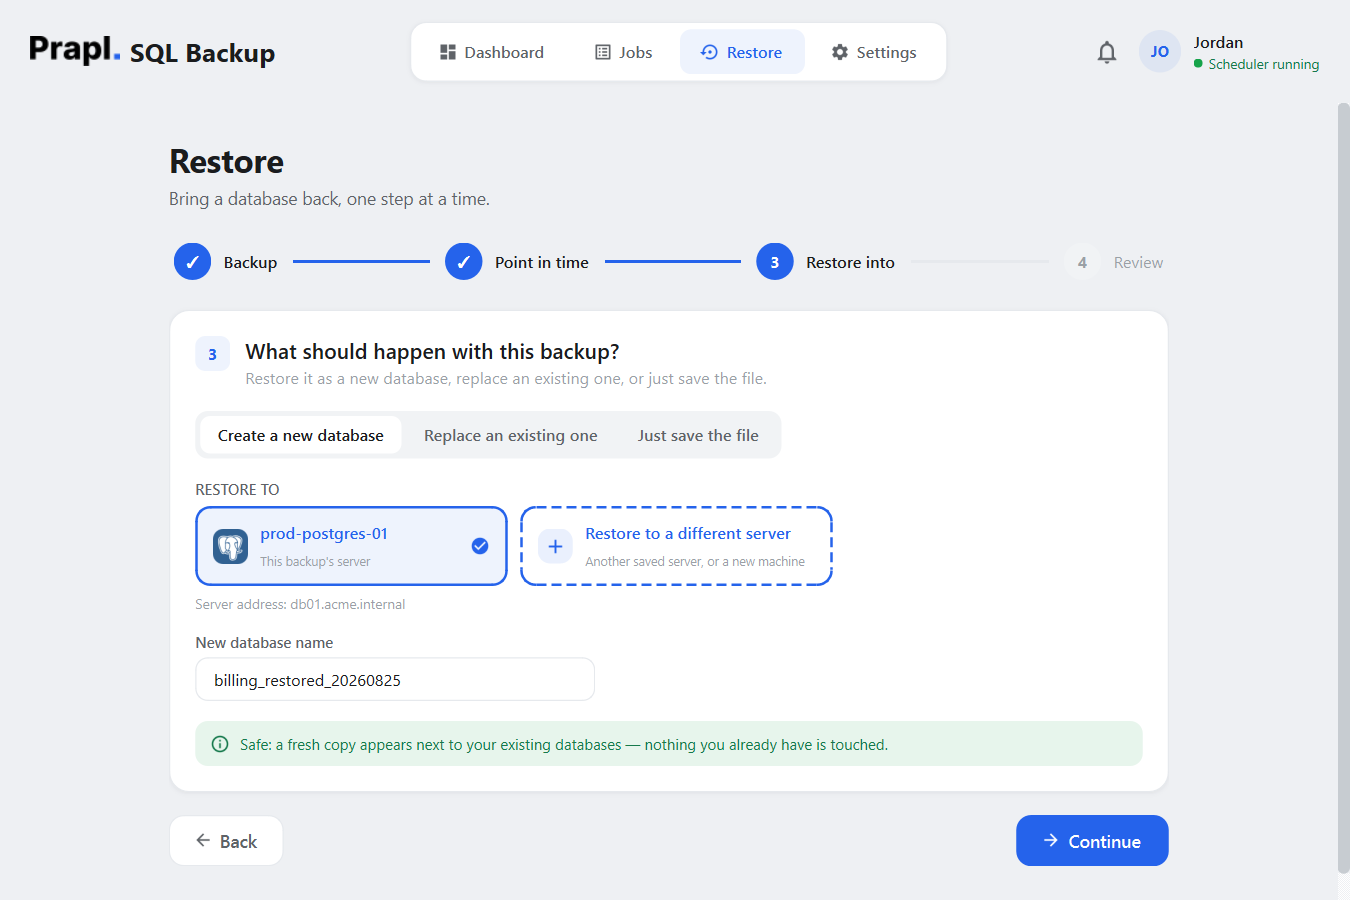
Restore step 3: choose to create a new database, replace the existing one or just save the file
Choose what to do with it → Restore backup
1

Open Restore

Click Restore at the top and pick the backup job.

2

Pick the day

Every stored copy is listed, newest first. The latest is already selected.

3

Choose where it goes

Put it back as a new database (safe to test), replace the old one, or just save the file.

4

Click Restore backup

The app fetches, unlocks and loads it. Watch the progress on the Dashboard.

Tip: after your first backup, try a restore as a new database once. Ten minutes today means total confidence on the day you really need it.

Ready? Your database can be protected by tonight.

Free for 15 days, no credit card. If it fits, it's $9 a month afterwards.

Free Download Read the full guide